4、Hyperf 3 微服务系列 - 从服务提供者开始
hi,我是温新,一名 PHPer
Hyperf 3 微服务代码已上传至 Github:https://github.com/ziruchu/hyperf3-microservice-code
说明:本次服务使用 json-rpc。
第一步:创建数据表
CREATE DATABASE hyperf-node;
USE hyperf-node;

CREATE TABLE `users` (
  `id` bigint unsigned NOT NULL AUTO_INCREMENT,
  `name` varchar(255) CHARACTER SET utf8mb4 COLLATE utf8mb4_unicode_ci NOT NULL,
  `gender` tinyint(1) NOT NULL DEFAULT 0,
  `created_at` timestamp NULL DEFAULT now(),
  `updated_at` timestamp NULL DEFAULT now(),
  PRIMARY KEY (`id`) USING BTREE
) ENGINE=InnoDB DEFAULT CHARSET=utf8mb4;
第二步:创建用户服务提供者
composer create-project hyperf/hyperf-skeleton node_provider_user
出现选项时,只选择时区和数据库,其余选择 N。
第三步:安装 JSON RPC 服务
cd node_provider_user/

composer require hyperf/json-rpc
composer require hyperf/rpc-server
第四步:修改 server.php 配置文件配置服务
修改 server.php 配置文件时,只需要对 servers 配置进行修改,其余的配置不动。
配置两步走:
1、删除 name=http 的配置;
2、添加 name=jsonrpc-http 的配置。
<?php
// config/autoload/server.php

use Hyperf\Server\Event;
use Hyperf\Server\Server;
use Swoole\Constant;

return [
    'mode' => SWOOLE_PROCESS,
    'servers' => [
        [
            'name' => 'jsonrpc-http',
            'type' => Server::SERVER_HTTP,
            'host' => '0.0.0.0',
            'port' => 9600,
            'sock_type' => SWOOLE_SOCK_TCP,
            'callbacks' => [
                Event::ON_REQUEST => [\Hyperf\JsonRpc\HttpServer::class, 'onRequest'],
            ],
        ],
    ],
    // 其他默认配置
];
第五步:修改 .evn 配置数据库
APP_NAME=node_provider_user

DB_DRIVER=mysql
DB_HOST=127.0.0.1
DB_PORT=3306
DB_DATABASE=hyperf-node
DB_USERNAME=hyperf
DB_PASSWORD=123456789
DB_CHARSET=utf8mb4
DB_COLLATION=utf8mb4_unicode_ci
DB_PREFIX=
第六步:业务代码编写
1、创建 User 模型
<?php
// app/Model/User.php
namespace App\Model;

class User extends \Hyperf\DbConnection\Model\Model
{
    protected array $guarded = [];
}
2、JsonRPC Service 层代码编写
创建 UserServiceInterface 接口
<?php
// app/JsonRpc/Interface/UserServiceInterface.php

namespace App\JsonRpc\Interface;

interface UserServiceInterface
{
    // 创建用户
    public function createUser(string $name, string $gender);

    // 获取用户信息
    public function getUserInfo(int $id);
}
创建 UserService 实现 UserServiceInterface
<?php
// app/JsonRpc/Service/UserService.php
namespace App\JsonRpc\Service;

use App\JsonRpc\Interface\UserServiceInterface;
use App\Model\User;
use Hyperf\RpcServer\Annotation\RpcService;

#[RpcService(name: "UserService", protocol: "jsonrpc-http", server: "jsonrpc-http")]
class UserService implements UserServiceInterface
{
    public function createUser(string $name, string $gender)
    {
        if (empty($name)) {
            throw new \RuntimeException('用户名不能为空');
        }

        $user = User::query()->create([
            'name'   => $name,
            'gender' => $gender,
        ]);

        return $user ? 'success' : 'failed';
    }

    public function getUserInfo(int $id)
    {
        $user = User::query()->find($id);
        if (empty($user)) {
            throw new \RuntimeException('没有该用户');
        }

        return $user->toArray();
    }
}
这个地方需要注意,我们在 UserService.php 中使用了 RpcService 注解,使用该注解后服务就已发布。该注解有 4 个参数,如下含义:
-
name属性为定义该服务的名称,这里定义一个全局唯一的名字即可,Hyperf 会根据该属性生成对应的 ID 注册到服务中心去; -
protocol属性为定义该服务暴露的协议,目前仅支持jsonrpc-http,jsonrpc,jsonrpc-tcp-length-check,分别对应于 HTTP 协议和 TCP 协议下的两种协议,默认值为jsonrpc-http,这里的值对应在Hyperf\Rpc\ProtocolManager里面注册的协议的key,它们本质上都是 JSON RPC 协议,区别在于数据格式化、数据打包、数据传输器等不同。 -
server属性为绑定该服务类发布所要承载的Server,默认值为jsonrpc-http,该属性对应config/autoload/server.php文件内servers下所对应的name,这里也就意味着我们需要定义一个对应的Server; -
publishTo属性为定义该服务所要发布的服务中心,目前仅支持consul、nacos或为空,为空时代表不发布该服务到服务中心去,但也就意味着您需要手动处理服务发现的问题,要使用此功能需要安装hyeprf/service-governance组件及对应的驱动依赖。
注意:publishTo 我们留空了,后续就要使用 hyperf/service-governance 组件了。
第七步:启动服务并测试
1、启动服务
2、使用 postman 进行测试,测试时需要注意参数,请求信息如下:
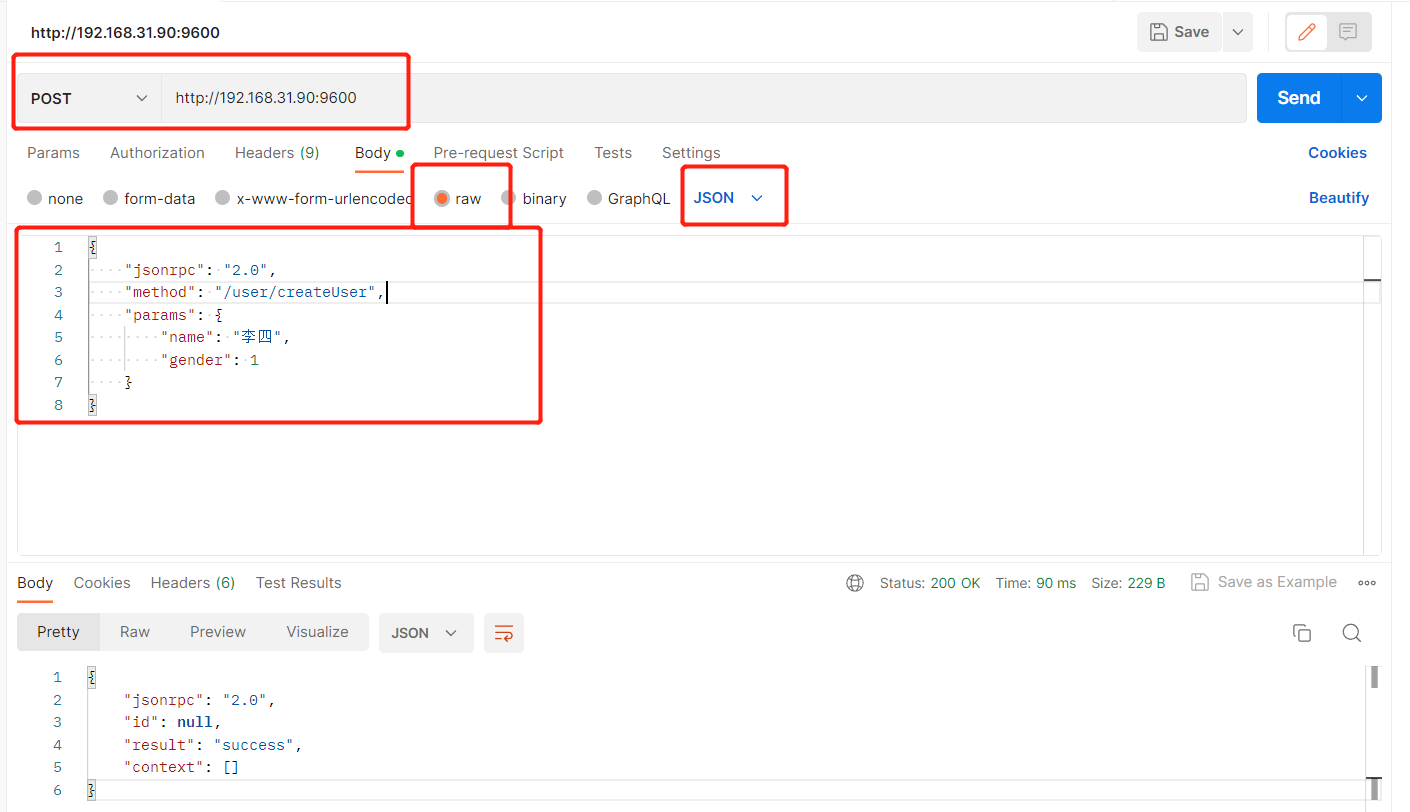
创建用户
请求地址:http://192.168.31.90:9600
请求方法:POST
请求参数
{
    "jsonrpc": "2.0",
    "method": "/user/createUser",
    "params": {
        "name": "李四",
        "gender": 1
    }
}
header头
Content-Type: application/json
响应结果
{
    "jsonrpc": "2.0",
    "id": null,
    "result": "success",
    "context": []
}
获取用户信息
请求地址:http://192.168.31.90:9600
请求方法:POST
请求参数
{
    "jsonrpc": "2.0",
    "method": "/user/getUserInfo",
    "params": {
        "id": 1
    },
    "id": "",
    "context": []
}
header头
Content-Type: application/json
响应结果
{
    "jsonrpc": "2.0",
    "id": "",
    "result": {
        "id": 1,
        "name": "李四",
        "gender": 1,
        "created_at": "2023-03-21 04:37:43",
        "updated_at": "2023-03-21 04:37:43"
    },
    "context": []
}
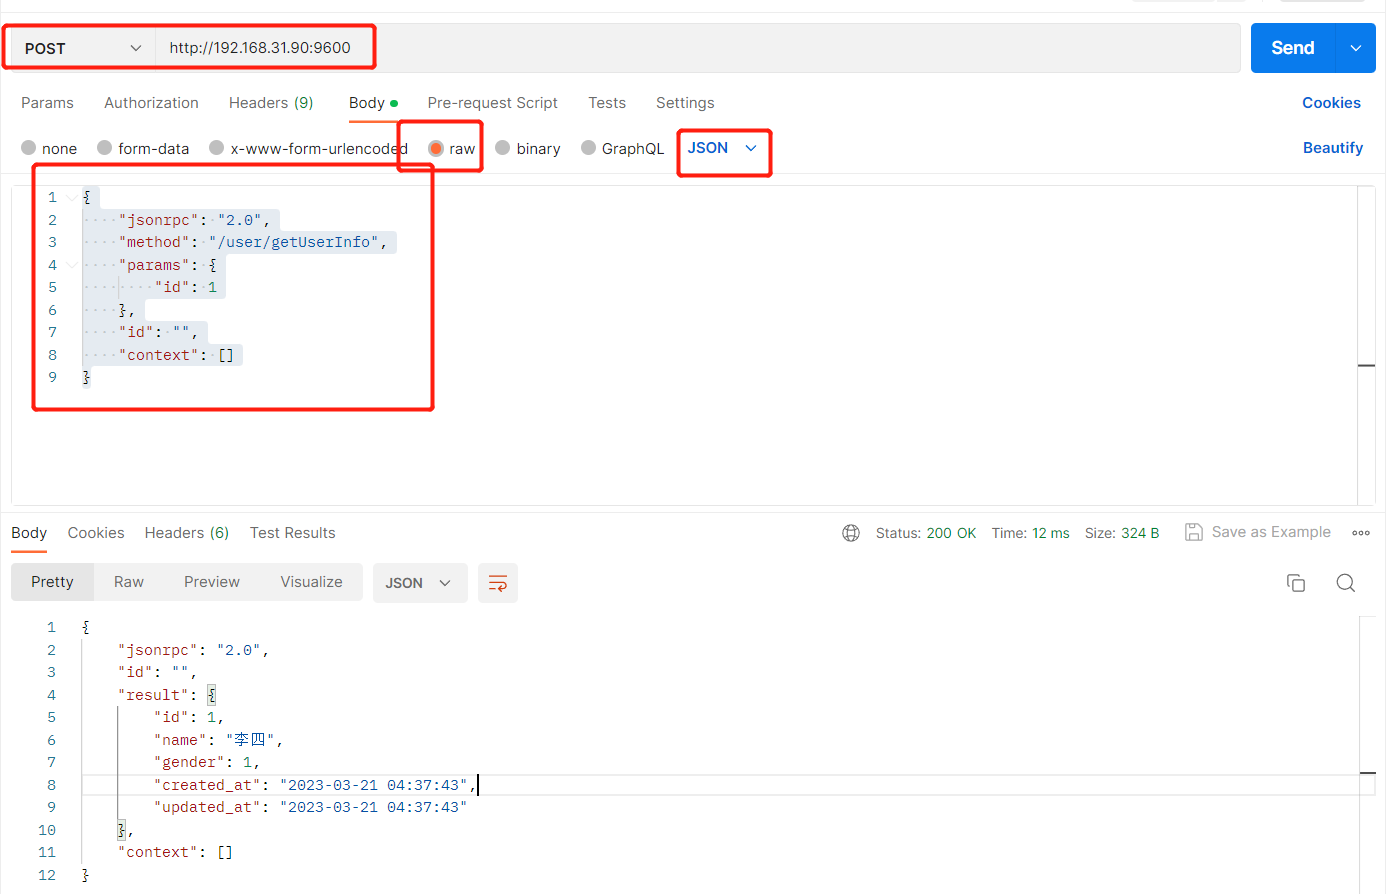
测试通过,用户服务提供者已经完成。
第八:关于请求与路由的说明
注意:Hyperf 中,微服务目前仅支持 POST 请求。
这里没有定义路由,怎么就可以通过路由进行访问了?
此时再来看看注解的定义:
# 定义注解
#[RpcService(name: "UserService", protocol: "jsonrpc-http", server: "jsonrpc-http")]
注解中 name: "UserService" 指服务,Hyperf 在底层会把 UserService中的 User 取出并转为小写,然后拼接当前服务类中的方法,并组成路由。如 UserService.php 中有 getUserInfo 方法,那么路由就是 /user/getUserInfo 。
本篇文章结束,我是温新。